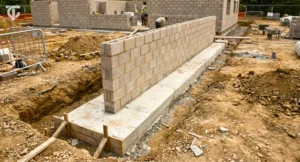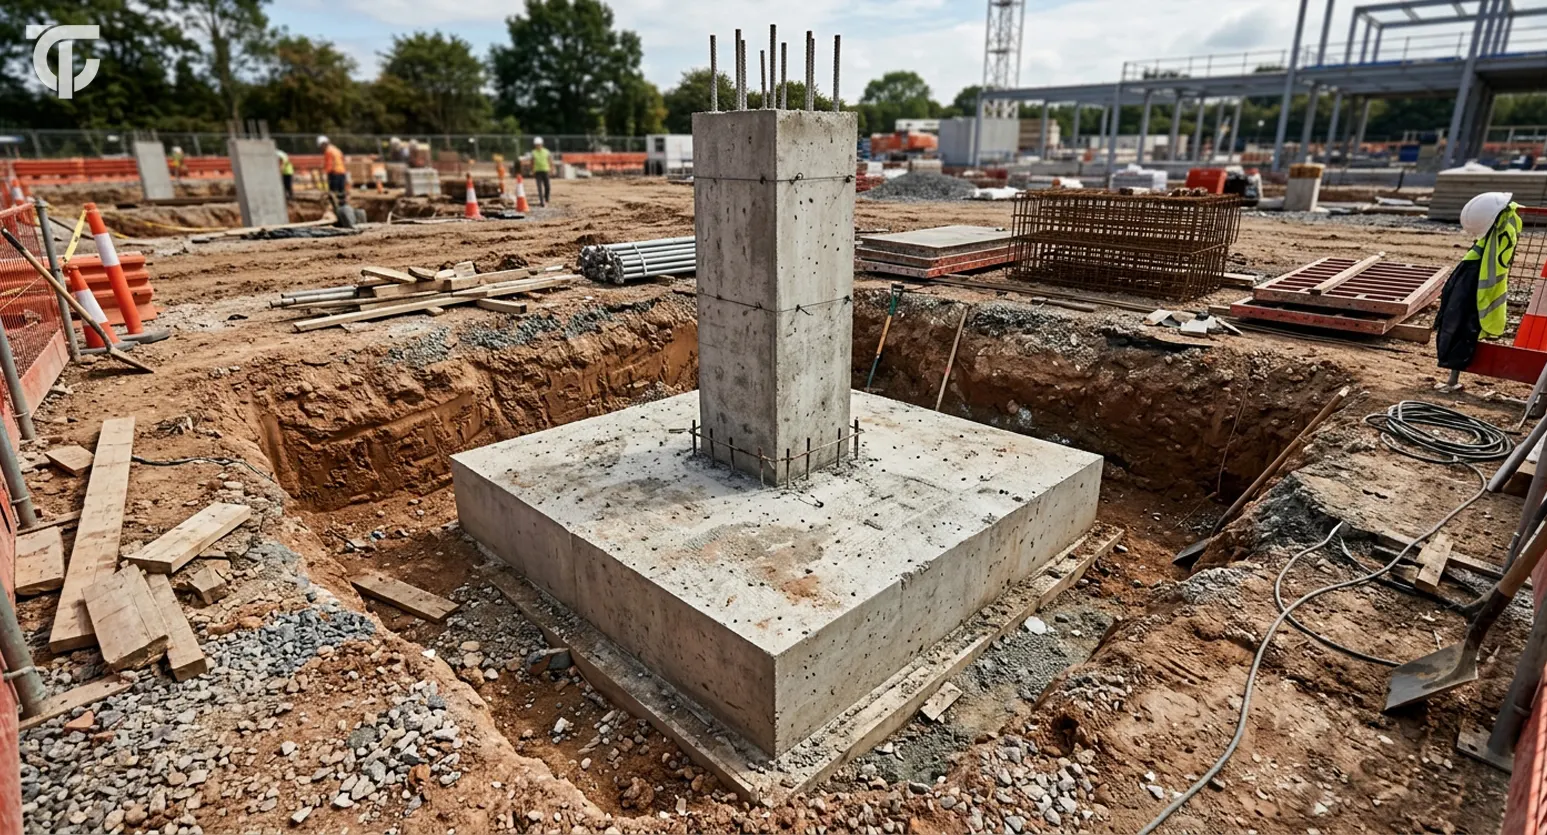

Picture a single concrete column standing on bare ground, carrying the full weight of a building above it. That column pushes down with tremendous force, concentrated onto a small patch of soil below. On its own, soil can’t handle pressure squeezed into such a tight spot; it would simply give way, and the column would sink or tilt.
This is the exact problem a foundation solves. It takes a column’s concentrated load and spreads it out across a wider area of soil the ground can actually support. An isolated footing foundation is one of the most widely used ways to do this for a single column, provided the soil and structural conditions on site allow for it.
This guide goes well beyond the basics you’ll find in most overviews. We’ll walk through how an isolated footing actually works, when it makes sense to use one, how engineers work out its size, what commonly goes wrong, and when a different foundation type might serve a project better.
💡 Did You Know?
According to the UK Office for National Statistics (ONS), a dwelling is officially counted as “started” the moment work begins on laying its foundation, a sign of how central foundation work is to the way housebuilding activity gets measured.
The methodology isn’t identical everywhere, though. Northern Ireland instead counts a dwelling as started from the date of its first building-control inspection, not the foundation-laying date.
What Is an Isolated Footing Foundation?
An isolated footing foundation is a footing built to carry the load of one individual column and transfer that load into the soil beneath it, spread across an area much larger than the column itself. It’s called “isolated” for a simple reason: Each footing stands on its own, supporting a single column rather than tying into a continuous strip or a shared slab carrying several columns together.
You’ll come across this same foundation under a couple of other names, too. Some engineers call it an isolated spread footing foundation, since it “spreads” the column’s load across a wider soil contact area. Others use isolated pad footing foundation, referring to the pad-like shape of the footing sitting below the column. These aren’t separate foundation types; they’re just different names construction professionals use for the same basic arrangement.
The column and its footing play distinct roles in this arrangement. The column is a slender structural member built to carry load vertically; left on its own, it would apply enormous pressure onto a tiny patch of soil. The footing beneath it is wider and typically shallower, built specifically to take that same load and bring the pressure down to a level the soil underneath can safely handle.
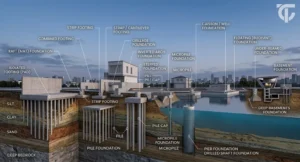
👉 If you’re trying to work out how isolated footings compare with strip footings, raft foundations, or pile foundations, our complete guide to the different types of building foundations covers each type in more depth. This article stays focused on isolated footings specifically.
How Does an Isolated Footing Work?
The easiest way to understand an isolated footing is to follow the load as it travels:
Structural Load → Column → Footing → Soil.
Everything starts above ground. Beams, slabs, and other structural elements collect the loads acting on a building: Its own weight, plus whatever it’s designed to carry. That load works its way down to the columns, which funnel it into a relatively small cross-section.
This is where the footing earns its place. Instead of letting that load punch straight into the soil at the column’s narrow footprint, the footing spreads it across a much wider contact area at its base. Engineers call the resulting pressure on the soil bearing pressure, and every soil has a limit to how much it can safely take. That limit is described by the soil’s bearing capacity, or more precisely, its allowable soil pressure once safety margins have been factored in.
Get the contact area right, and the soil supports the load without excessive movement. Get it wrong, and the soil can compress unevenly over time, a problem known as settlement. That’s really why isolated footings exist: To keep bearing pressure within limits the soil can handle over the long run, not just on the day construction wraps up.
📌 One thing worth being clear about:
Making a footing bigger doesn’t automatically fix every foundation problem. A larger footing still has to satisfy structural checks, geotechnical requirements, settlement limits, and stability requirements; size alone isn’t the whole story. We’ll get into those checks later in this guide.
Where Is an Isolated Footing Used?
Isolated footings tend to show up wherever a building’s load-bearing system is organized around individual columns rather than continuous walls. A few conditions usually need to line up before they make sense.
Individual columns supporting the structure.
Isolated footings work best when a building’s structural design already relies on individual columns to carry load down to the ground, which is common in framed construction, whether residential or commercial.
Soil that can carry the load near the surface.
Because isolated footings sit relatively shallow, the load-bearing soil close to ground level needs adequate bearing capacity. Where near-surface soil is weak or highly variable, other foundation types often become more practical, and a proper site investigation is what actually tells you which situation you’re in.
Columns spaced far enough apart.
When columns sit too close together, the isolated footings sized to support them can end up overlapping, or crowding so tightly that they behave more like one continuous footing. At that point, a combined footing or a strip foundation usually makes more sense.
You’ll find isolated footings supporting all kinds of column-supported structures: Low-rise residential buildings, porches, decks, and freestanding structural posts, among others. That said, not every residential building uses isolated footings. The right choice always comes down to the specific loads, soil, and layout involved on that particular site.
🔎 For Context
The scale of residential construction gives some sense of how much foundation work happens every year.
According to the U.S. Census Bureau, building permit offices across the country authorized 1,431,616 new privately owned housing units in 2025, valued at a combined $378.99 billion, about 3.1% lower than the total recorded in 2024.
That figure doesn’t tell us how many of those homes rest on isolated footings specifically; it simply reflects the overall pace of new housing activity in the U.S.
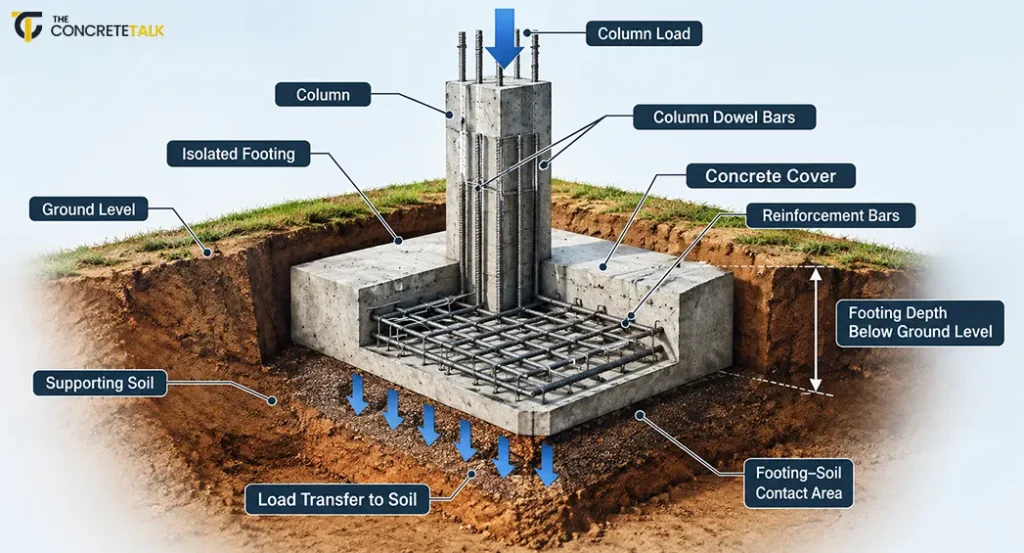
Isolated Footing Foundation Diagram
A diagram helps make the next few sections easier to follow, since construction sequence and structural terms are usually easier to picture than to describe in text alone.
Key Components of an Isolated Footing
Before getting into how an isolated footing actually gets built, it helps to know what’s inside one.
Column
The column carries load down from the structure above. By the time this load reaches the footing, it’s concentrated into the column’s relatively small cross-section, which is exactly the problem the footing exists to solve.
Footing slab/base
This is the wider, shallower concrete element beneath the column. Its job is to take that concentrated column load and spread it across enough soil area to keep the bearing pressure within the soil’s allowable pressure.
Reinforcement
Concrete handles compression well but isn’t nearly as good at resisting tension or bending. Reinforcement bars, usually steel, sit inside the footing to pick up those tensile and bending effects, which keeps the footing from cracking or failing under load.
Column dowel bars/connection
Where the column meets the footing, reinforcement from the column typically continues into the footing to keep the two elements structurally connected. This connection is often built using column dowel bars, sized and detailed according to the project’s structural drawings rather than a fixed rule.
Concrete cover
Reinforcement needs a layer of concrete around it, known as cover, to protect it from moisture, corrosion, and fire exposure over time. How much cover is required depends on the applicable design code, exposure conditions, and the specific project; there isn’t one universal number that fits every footing.
Supporting soil
It’s tempting to think of soil as just “what the footing sits on,” but it’s really part of the foundation system’s performance. How that soil behaves under load, its strength, compressibility, and consistency influence how well the footing performs just as much as the concrete and reinforcement do.
Isolated Footing Construction: Step-by-Step
Isolated footing construction follows a fairly consistent sequence on most projects, even though the specific details shift from site to site. Here’s how it typically plays out.
Step 1 — Site investigation and preparation
Before any digging starts, the soil conditions need to be understood, not assumed. A proper site investigation is what actually establishes soil bearing capacity; a quick look at the ground during a site visit doesn’t tell you enough on its own. Once that’s confirmed, the crew clears and prepares the work area, and the layout and levels get checked against the drawings.
Step 2 — Setting out
This step locates the column centerline and marks the exact position of the footing. Getting it right matters more than it might seem; even a small error here can throw off the entire column layout above ground.
Step 3 — Foundation excavation
Foundation excavation is carried out to the level called for in the design. The excavation needs to stay stable throughout, and care has to be taken not to disturb the bearing soil at the base. If unsuitable material turns up during excavation, it typically gets removed on the instruction of the site or design engineer rather than left in place.
Step 4 — Base preparation
Once excavation is done, the base gets cleaned and checked. Loose or soft material is removed where required, and the surface is leveled and prepared before reinforcement and concrete go in. The exact preparation method depends on the project’s soil conditions and specification.
Step 5 — Reinforcement placement
Reinforcement gets placed according to the structural design, not by eye. Bars need to sit in the correct position, with the required spacing and cover maintained throughout. They’re also supported, often on spacers or chairs, so they don’t shift out of place once concrete placement begins.
Step 6 — Column starter/dowel arrangement
The column’s reinforcement gets connected into the footing at this stage, continuing the structural link between column and footing according to the drawings. This is sometimes called the column dowel bar arrangement, and like the reinforcement schedule itself, the specific bar sizes and lap lengths come from the structural design, not a general rule of thumb.
Step 7 — Concrete placement
Concrete gets placed according to the project’s specification, with care taken to avoid displacing the reinforcement already in position. Proper compaction removes air pockets and helps the concrete settle fully around the reinforcement, and the formwork or excavation geometry gets checked as the pour proceeds.
Step 8 — Concrete curing
Concrete curing keeps the concrete moist and at a suitable temperature while it gains strength, a step that matters more than people often realize. Skipping or rushing it can lead to reduced strength, more shrinkage cracking, and lower durability over time. How long curing needs to continue depends on the concrete mix, the weather, and the applicable specification or standard, so there’s no single number that fits every project.
Step 9 — Inspection
Before backfilling starts, the footing gets checked against the drawings and specification: location, dimensions, reinforcement, cover, column position, concrete quality, and general workmanship all get reviewed at this stage.
Step 10 — Backfilling and compaction
Once the concrete has reached the required condition and passed inspection, the surrounding excavation can be backfilled according to the project’s requirements. Proper compaction of the backfill matters for the finished ground’s stability, though the specific compaction requirement depends on the project’s geotechnical specification rather than a fixed percentage.
Isolated Footing Construction Process
The isolated footing construction process, laid out as a quick-reference sequence, looks like this:
- Site investigation and preparation
- Setting out
- Excavation
- Base preparation
- Reinforcement placement
- Column dowel/starter arrangement
- Concrete placement
- Curing
- Inspection
- Backfilling and compaction
Each step depends on the one before it. Skipping ahead and pouring concrete before reinforcement gets checked, for instance, is one of the more common ways construction quality slips on site.
How Is the Size of an Isolated Footing Determined?
There’s a simple way to start thinking about footing size, though it comes with an important caveat right up front. A conceptual starting point looks like this:
Required Footing Area ≈ Structural Load ÷ Allowable Soil Pressure
This is only a preliminary relationship, not a complete footing design method. It gives a rough sense of how much contact area a footing might need, based on the load coming down through the column and the pressure the soil beneath it can safely take. Treat it as a starting figure to be refined, not a number to build from directly.
Several factors influence where that starting figure ends up, and how much it needs to be adjusted:
- Structural loads acting on the column
- Allowable soil pressure and the soil’s underlying bearing capacity
- Footing geometry and the column’s own dimensions
- Eccentricity, where the load doesn’t act exactly at the footing’s center
- Bending effects the footing has to resist
- One-way shear and punching shear
- Settlement behavior
- Overturning and sliding stability
- The applicable design code
- Site-specific conditions
Once a preliminary area has been worked out, the design still has to go through structural and geotechnical checks before it’s considered complete. Dividing the load by the soil’s allowable pressure gets you a starting point; it doesn’t get you a finished footing.
Soil and Site Conditions to Consider
Not every soil can support an isolated footing safely, but that doesn’t mean any given soil is automatically “good” or “bad” for the job. Suitability comes down to how that particular soil behaves under the loads a particular structure will place on it. A few things matter most:
Soil bearing capacity and allowable soil pressure.
These describe how much load the soil can carry safely, and they form the basis for sizing the footing in the first place.
Settlement and differential settlement.
All soil compresses somewhat under load. The real concern is uneven settlement across a structure differential settlement which can cause far more visible damage than settlement that happens evenly across the board.
Groundwater and site conditions.
Water table depth, seasonal groundwater changes, and drainage patterns on site can all affect how soil performs beneath a footing.
Soil variability.
Conditions can change noticeably across a single site, sometimes within just a few meters. That’s part of why a proper site investigation matters more than assumptions based on a nearby project.
Fill, loose, or weak soil.
Where near-surface soil has been disturbed, poorly compacted, or naturally weak, it may not provide a reliable bearing surface without additional preparation or a different foundation approach altogether.
Slope and site stability.
On sloped sites, overall site stability becomes part of the picture alongside the soil’s bearing capacity.
Structural Design Considerations
Once the preliminary size is in hand, a series of structural checks confirms whether the footing actually performs the way it needs to. Here’s what each one is looking at, in plain terms:
✅ Bearing Pressure
This is the pressure the footing applies to the soil beneath it. The check simply confirms that pressure stays within limits the soil can safely handle.
✅ Eccentric Loading
Sometimes a load doesn’t act exactly through the center of a footing, whether because of how the column is positioned or because of moments transferred from above. This is called eccentric loading, and it matters because it changes how pressure spreads across the footing’s base.
✅ Soil Pressure Distribution
When loading is eccentric, the pressure under the footing isn’t necessarily uniform from one edge to the other. Understanding this distribution helps confirm the footing isn’t overstressed at any single point.
✅ Bending Moment
The footing behaves like a structural element under load, not just a slab of concrete sitting on the ground. It has to resist bending effects, much like a beam does; one reason reinforcement is needed inside it in the first place.
✅ One-way Shear
This check looks at how the footing resists shear forces acting across its width, similar to how a beam gets checked for shear.
✅ Punching Shear
Right around the column, the concentrated load can create a localized shear effect that behaves differently from one-way shear, almost like the column trying to “punch” straight through the footing. This check addresses that specific zone immediately surrounding the column.
✅ Overturning and Sliding Stability
For footings carrying significant lateral loads or moments, stability checks confirm the footing won’t tip over (overturning) or slide sideways (sliding) under the worst loading conditions the design anticipates.
📌 None of these checks come with one fixed, universal safety margin that applies to every project. The specific values depend on the applicable structural and geotechnical design standard, which itself depends on where the project sits and which code governs the design.
Reinforcement in an Isolated Footing
Reinforcement inside an isolated footing exists to do what concrete alone can’t; it can resist tension and handle bending. Rather than prescribing a specific bar size or spacing, it’s more useful to understand what the reinforcement is actually there to accomplish.
The bars need to sit in the correct position, at the spacing called for in the structural design, with the specified concrete cover maintained around them throughout. Correct placement isn’t a minor detail; reinforcement that shifts out of position during concrete placement can end up doing far less than it was designed to do.
Where column dowels or starter bars connect the column to the footing, the anchorage and development length of those bars need to follow the applicable design requirements, so the connection can actually transfer load the way it’s meant to.
Because reinforcement disappears the moment concrete gets placed, inspection before that pour is the last real chance to confirm everything is where it should be. Once concrete is on the ground, checking becomes far harder and fixing anything becomes far more expensive.
For a general informational overview like this one, handing out a specific bar size and spacing wouldn’t be responsible. The real numbers depend entirely on the loads, soil conditions, and applicable code governing that particular project.
Common Problems and Failure Risks
Even a well-designed isolated footing can run into trouble if something along the way goes wrong. Knowing what to watch for makes it easier to catch problems early.
Problem 1 — Foundation settlement
Excessive settlement can happen for a handful of reasons: an incomplete or inaccurate soil assessment, unsuitable or weak soil that wasn’t accounted for, loads that exceed what the footing was designed for, poor construction practices, or soil conditions that change due to water over time.
Problem 2 — Differential settlement
Settlement itself isn’t always the real problem; uneven settlement often is. When one part of a structure settles more than another, the result can be cracking, uneven floors, visible structural distress, or misalignment between building elements. That said, not every crack in a building comes from differential settlement; plenty of other causes exist too.
Problem 3 — Excessive bearing pressure
If a footing’s area turns out too small for the actual load, or if assumptions about the soil’s bearing capacity were off, the resulting bearing pressure can exceed what the soil can safely carry.
Problem 4 — Eccentric loading
When a load doesn’t act through the center of the footing, the pressure beneath it stops being uniform. Left unaddressed, this uneven pressure distribution can affect how the footing performs over time.
Problem 5 — Poor reinforcement placement
Reinforcement that ends up in the wrong position, doesn’t have enough cover, or shifts during concrete placement won’t do its job the way the design intended.
Problem 6 — Poor concrete quality or curing
Concrete that’s mixed, placed, or cured poorly won’t reach the strength and durability the design assumes, which can compromise the footing regardless of how well everything else was done.
Problem 7 — Water and drainage problems
Water on site, whether from groundwater or poor drainage, can affect soil conditions and durability depending on the specific situation. It’s not accurate to say groundwater automatically causes failure, but it’s a factor worth managing carefully.
Problem 8 — Poor excavation or base preparation
Disturbed soil, loose material left in place, unsuitable fill, or inadequate compaction at the base can all undermine a footing before it’s even poured.
Advantages of Isolated Footings
Isolated footings remain a common choice for good reason, though the benefits below come with the usual caveat: They hold up “when conditions are suitable,” not universally.
- Can be economical when conditions are right. Where individual columns can be supported independently, and the soil is suitable, isolated footings can be one of the more economical foundation options available.
- Relatively straightforward construction. Compared with more complex foundation systems, the construction sequence tends to be easier to plan and execute.
- Well suited to individual column support. Each footing supports one specific column, which keeps the structural logic simple.
- Flexible column layout. Individual footings can work well across a range of column spacings, as long as they don’t end up too close together.
- Easier inspection. Because each footing is a separate element, inspection and construction monitoring tend to be more straightforward on many projects.
Limitations of Isolated Footings
Isolated footings aren’t the right choice everywhere, and it’s worth being upfront about where they run into limits.
They can struggle where near-surface soil is weak, where settlement risk is high, or where columns sit too close together and their footings would overlap. High structural loads, significant eccentricity or moments, tight site constraints, and generally difficult ground conditions can all push a project toward a different foundation solution.
None of this means isolated footings are simply “bad” for weak soil in every case. It means their suitability becomes limited in situations where near-surface soil can’t safely support the required loads or meet the project’s settlement criteria, at which point a different foundation type may be worth considering.
Final Thoughts
An isolated footing does one job well: It takes the load from a single column and spreads it into the soil below, at a pressure the ground can actually handle. Whether that’s the right choice for a given project comes down to the soil, the loads, how the columns are spaced, expected settlement, and the structural requirements specific to that site.
None of that replaces good construction practice. Even a well-designed footing depends on careful excavation, correctly placed reinforcement, sound concrete work, and proper curing to perform the way it’s supposed to.
If there’s one takeaway worth carrying forward, it’s this: A reliable isolated footing starts with a proper site investigation and a design based on the actual conditions of the project, not assumptions borrowed from somewhere else.
Frequently Asked Questions
What Is an Isolated Footing Foundation?
An isolated footing foundation supports a single column and transfers its load into the soil beneath, spread across an area wide enough to keep the resulting pressure within what that soil can safely carry.
When Is an Isolated Footing Used?
It’s typically used where a building relies on individual columns, the soil has adequate bearing capacity, columns are spaced far enough apart to avoid overlapping footings, and the loads and expected settlement fall within acceptable limits for the site.
How Is the Size of an Isolated Footing Determined?
Size starts with a rough estimate based on the structural load and the allowable soil pressure, then gets refined through structural checks covering settlement, eccentricity, bending, shear, and the applicable design code. There’s no fixed dimension that applies to every footing; the final size depends on the specific project.
What Are the Common Problems With Isolated Footings?
The most common issues include settlement and differential settlement, excessive bearing pressure, eccentric loading, poor reinforcement placement, poor concrete quality, inadequate base preparation, and drainage or site-related water issues.
Is an Isolated Footing Suitable for Every Soil Condition?
Not automatically, no. Foundation selection depends on the structure itself, the loads it carries, the soil beneath it, expected settlement, column layout, site constraints, the applicable design code, and the practical conditions on site during construction.
The right foundation gets chosen through engineering assessment, not popularity or habit. There’s no single foundation solution that fits every project, which is exactly why site investigation and proper design come before construction, not after.